[Post Date]
Your DIY guide to making recycled paper at home

Every day, Singapore produces approximately 16,120 tonnes of waste – that’s enough to fill about 7 Olympic-sized swimming pools! However, with a low domestic recycling rate of 13%, most of these waste are sent for incineration at our local landfill. Given our limited landmass in Singapore, this is a worrying trend as there is simply not enough space to hold all our trash! Our only landfill – Semakau Landfill – is estimated to be fully utilised by 2035.
As Singapore works towards building a circular economy, how can each of us contribute by increasing our recycling efforts? For starters, let’s focus on recycling one of the most common items – paper.
There are many ways which we can recycle paper. This includes dropping them off at the nearest recycling bin or selling them to our local karang guni – rag and bone man.
However, did you know that you can try paper recycling right at home as well, and customise them into your very own greeting cards or gift tags that’s truly one of its kind. So here’s an easy and fun eco-friendly guide to get you started on making your own recycled paper!
The entire process is simple – no fancy craft tools required. All you need are:
- Old / used papers such as newspapers, magazines, notebooks etcetera
- An A5-sized hard plastic mesh
- Cotton cloth
- Large container, preferably A4-sized or bigger
- Water
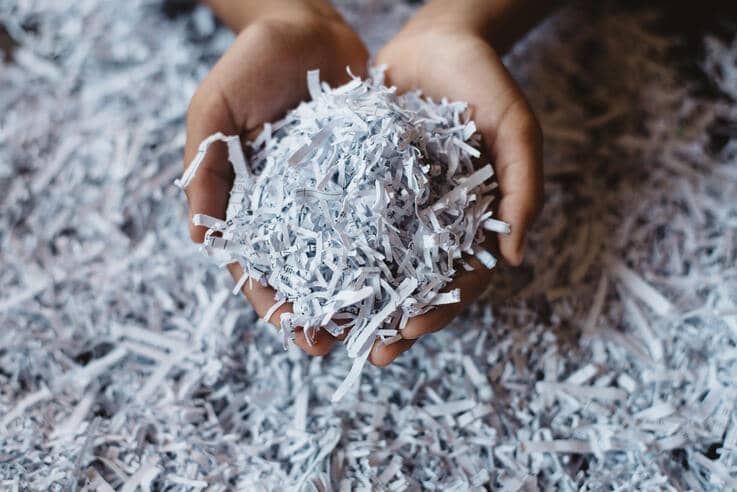
Step 1: Tear your old pieces of paper into small bits
Gather your old scraps of paper and make sure that they’re void of any plastic or staples before tearing them into small pieces about an inch wide and throwing them into your container. Feel free to make the pieces of paper as tiny as possible to get them soaked more easily in the next step.
Should you have some old scraps of thicker paper such as drawing paper or watercolour paper lying around, do also include them into the container as well – this will help in producing a stronger, thicker quality for your final product.
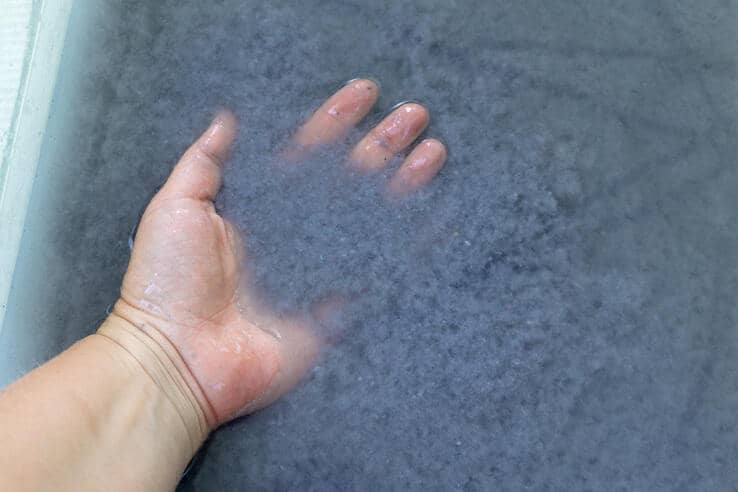
Step 2: Soak your papers bits
Thereafter, fill your container of paper scraps with water before leaving them to soak for 24 hours. While the ratio of pulp to water can vary depending on how thick you’d like your sheets to be, the general rule of thumb is to have equal measures of paper pieces and water. The more pulp to water, the thicker your paper will be, so feel free to experiment by changing up the ratio. Do remember to stir the bowl occasionally to prevent the paper pieces from clumping together!
Step 3: Dip the A5 plastic mesh into the container
After 24 hours of soaking, you are now ready to start making your first piece of paper! For those of us wondering about the kind of plastic mesh that would work for this – check out an example below! Essentially, any plastic mesh that is hard and sturdy would do the trick.
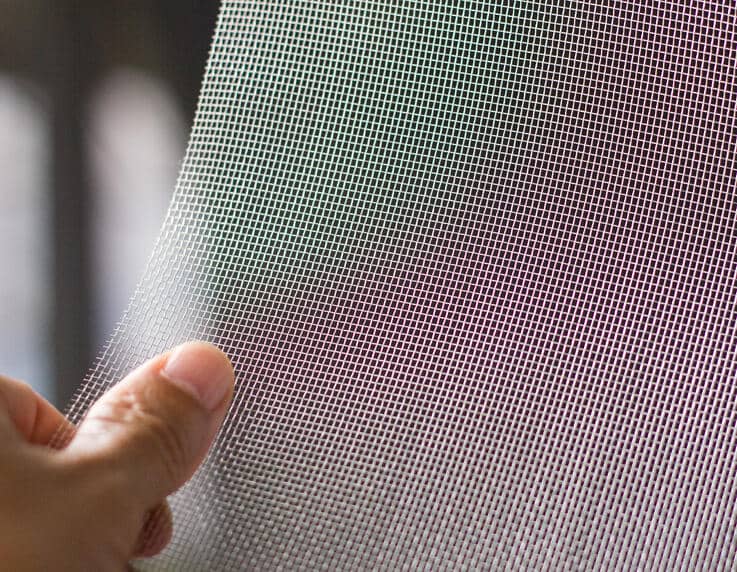
Slowly dip one side of your plastic mesh into the mixture at a 45-degree angle and flatten it at bottom of the container. Gradually, the paper mâché will start gathering on top of the mesh, covering it from top to bottom. Allow the paper mâché to settle on the mesh as evenly as possible.
Do be patient for this step ad you may end up with sheets of uneven and bumpy paper if the pulp mixture does not settle evenly!
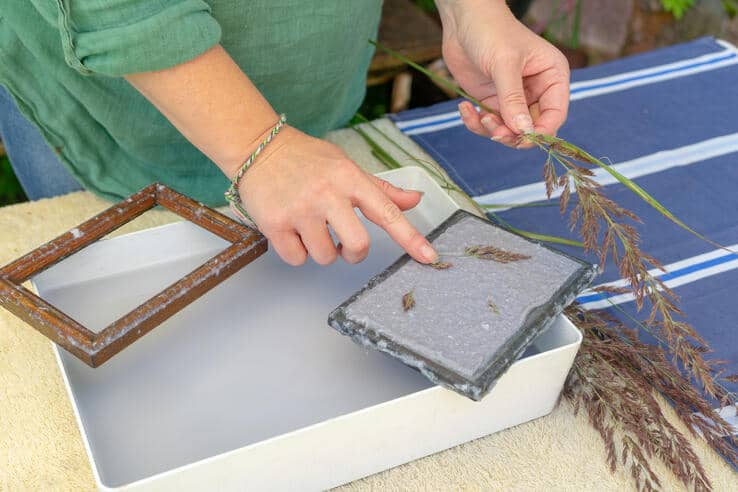
Step 4: Shape the paper mâché
Lift the mesh out of the container with as little disturbance to the pulp mixture as possible. Thereafter, gently use your fingers to even out the borders of the paper mâché on the plastic mesh. Don’t worry if they’re not perfect – it’s part of the process of DIY-ing our own recycled paper!
Once you’re happy with the shape of your paper, you can even add some decorative elements such as dried leaves or dried rose petals to beautify your recycled paper. Feel free to let your creativity run!
Step 5: Flip the paper mâché on a non-stick surface
Once the borders are more or less even, place the paper mâché side of the plastic mesh down on a non-stick surface, such as a wooden or glass table, before using your cotton cloth to soak as much water as possible from the top. When most of the excess water has been drained, carefully peel off the mesh and allow the paper mâché to dry overnight. If you’re excited to start using your recycled paper as quickly as possible, you can even use a hairdryer to hasten the process.
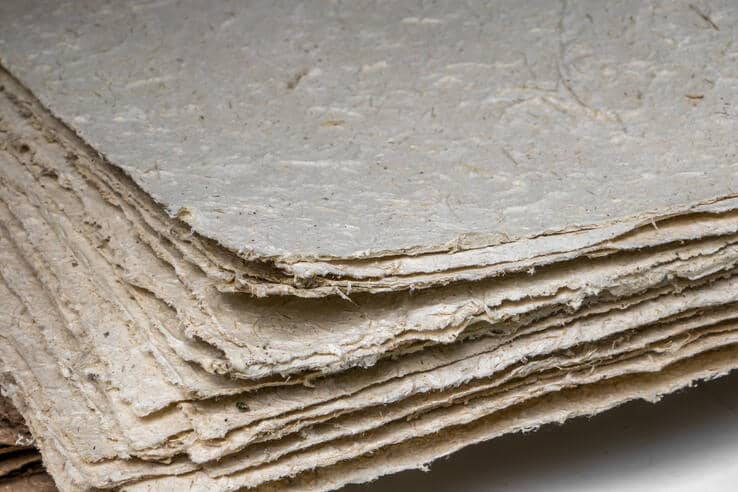
And that’s it! Once the paper mâché is completely dried, they should be slightly wavy and crisp. You can bind the various pieces together into your very own unique notebook or cut them up into smaller pieces to form a gift tag. You can even use these handmade papers as a Valentine’s Day card, or for other occasions and celebrations throughout the year – the possibilities are endless!
We hope that this easy tutorial will inspire you to recycle your old pieces of paper right at home. This activity is also a great opportunity to educate our little ones on how they can effect a change for our environment through such small but meaningful actions!
And if you find yourself wondering what to do with the stack of red packets you’ve collected this Chinese New Year, you can recycle them too by joining us in our #ChangeBringsProsperity initiative! Simply drop them off at any of our 25 Used Red Packet Recycling Bins located across the island from now till 6 March at Wisma Atria, or any IUIGA, CRU, and our Changemaker – Refash‘s outlets – after you’ve emptied them of course!
These red packets will then be collected by Tay Paper Recycling, where they’ll be pulped and made into other paper products such as tissue, paper towels and more writing paper!
Together, we can all #PowerTheChange by adopting a zero-waste lifestyle and work towards a greener future.
